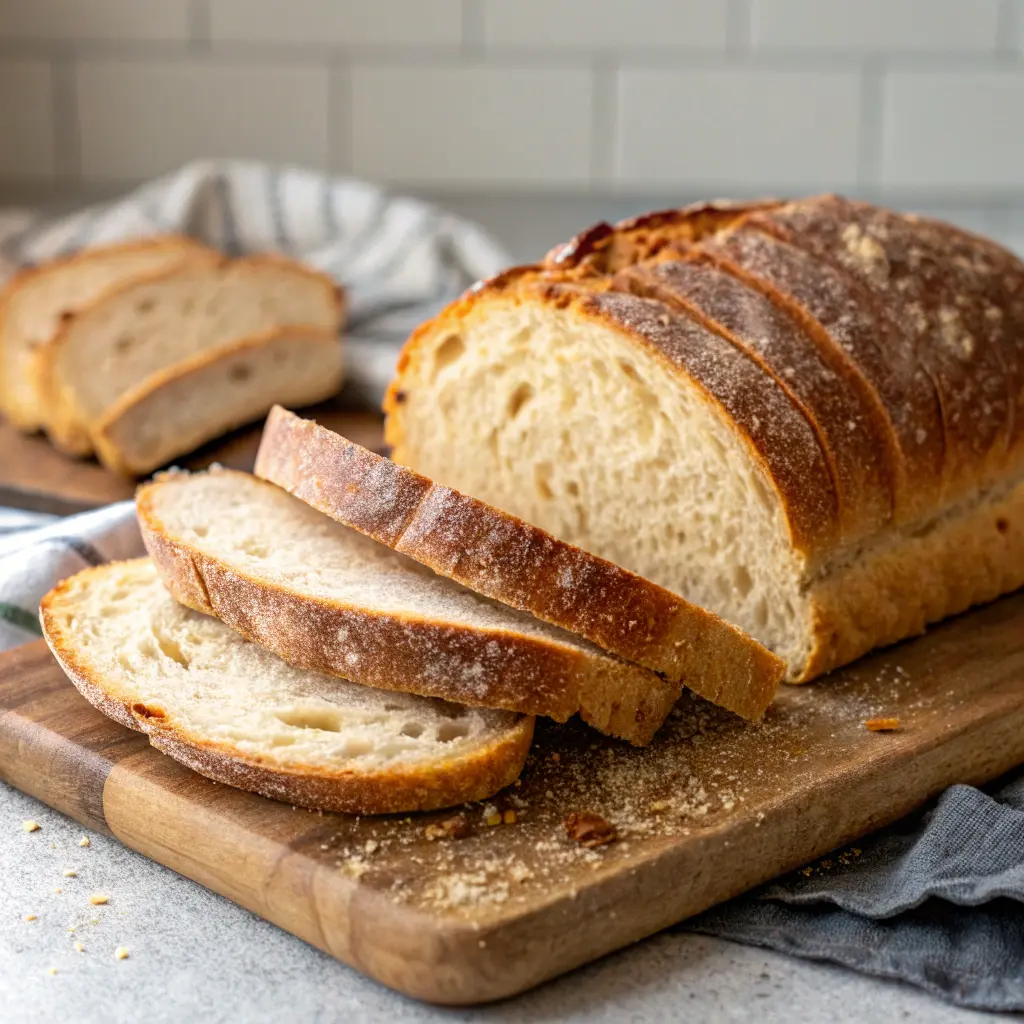
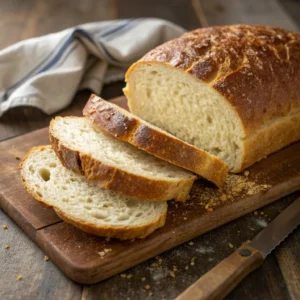
Sourdough Sandwich Bread
My Go-To Sourdough Sandwich Bread (The One I Make on Repeat)
Girl, let me tell you about this bread.
This is the sourdough sandwich bread I make when I want soft slices, cozy vibes, and zero crusty-artisan-bread drama.
You know I love a rustic loaf moment, but sometimes you just want bread that behaves — like, fits in the toaster, holds a sandwich, and doesn’t fight back when you bite it.
The first time I nailed this recipe, I literally stood in the kitchen holding a warm slice with butter melting into it like, oh… so this is who I am now.
Soft crumb, lightly tangy, golden top, and that subtle sourdough flavor that makes you feel like a baking goddess without turning your kitchen into a science lab.
This is the bread I make for weekday toast, grilled cheese nights, turkey sandwiches, and those “I’m just gonna eat bread with butter and call it a meal” days. No shame. Zero.
Why I’m Obsessed with This Sourdough Sandwich Bread
Okay babe, here’s the thing — most sourdough recipes online act like you need a PhD and 12 hours of free time.
This one? Cozy, practical, and forgiving. Just like we like it.
Here’s why it’s that girl:
- Soft and fluffy, not dense or gummy
- Mild sourdough flavor (not aggressively tangy)
- Slices cleanly — no crumbling meltdown
- Perfect for sandwiches, toast, and French toast
- Looks impressive but feels chill
I wanted a loaf that feels homemade and useful. This is not a “look at me on Instagram” loaf — this is a “make lunch, babe” loaf.
What You’ll Need (No Fancy Stuff, Promise)
Alright friend, grab your starter and let’s do this. Here’s the no-stress ingredient list:
- 1 cup active sourdough starter (bubbly and happy)
- ¾ cup warm milk (whole milk = extra cozy)
- 2 tablespoons honey or sugar (just enough sweetness)
- 2 tablespoons melted butter or oil
- 1 teaspoon salt
- 3 to 3 ½ cups all-purpose flour
Optional but encouraged:
- Extra butter for brushing the top (because duh)
Maria’s Starter Pep Talk
If your starter hasn’t been fed in a while and looks a little sleepy, feed her and wait till she’s bubbly and doubled. This bread likes a confident starter, not one having an existential crisis.
How to Make This Cozy Sourdough Sandwich Bread
1. Mix the good vibes
In a big bowl, stir together the starter, warm milk, honey, and melted butter.
It should look creamy and smooth — like a cozy latte situation. If it smells slightly tangy and comforting, you’re winning already.
Add the salt and 3 cups of flour. Mix until it comes together into a soft dough. If it feels sticky but manageable, you’re right on track. If it’s super wet, sprinkle in a little more flour — slowly, babe. Don’t panic-dump.
2. Knead it like you mean it
Turn the dough onto a lightly floured surface and knead for about 8–10 minutes.
This is your therapy moment. Push, fold, turn. Repeat.
You’re looking for dough that’s:
- Smooth
- Elastic
- Slightly tacky but not sticky
If you poke it and it gently springs back, congrats — you did that.
3. First rise (aka: let her nap)
Place the dough in a lightly oiled bowl, cover it, and let it rise somewhere warm until doubled.
This can take 3–5 hours depending on your kitchen and starter mood.
No rushing here. Sourdough does not respond well to pressure — same.
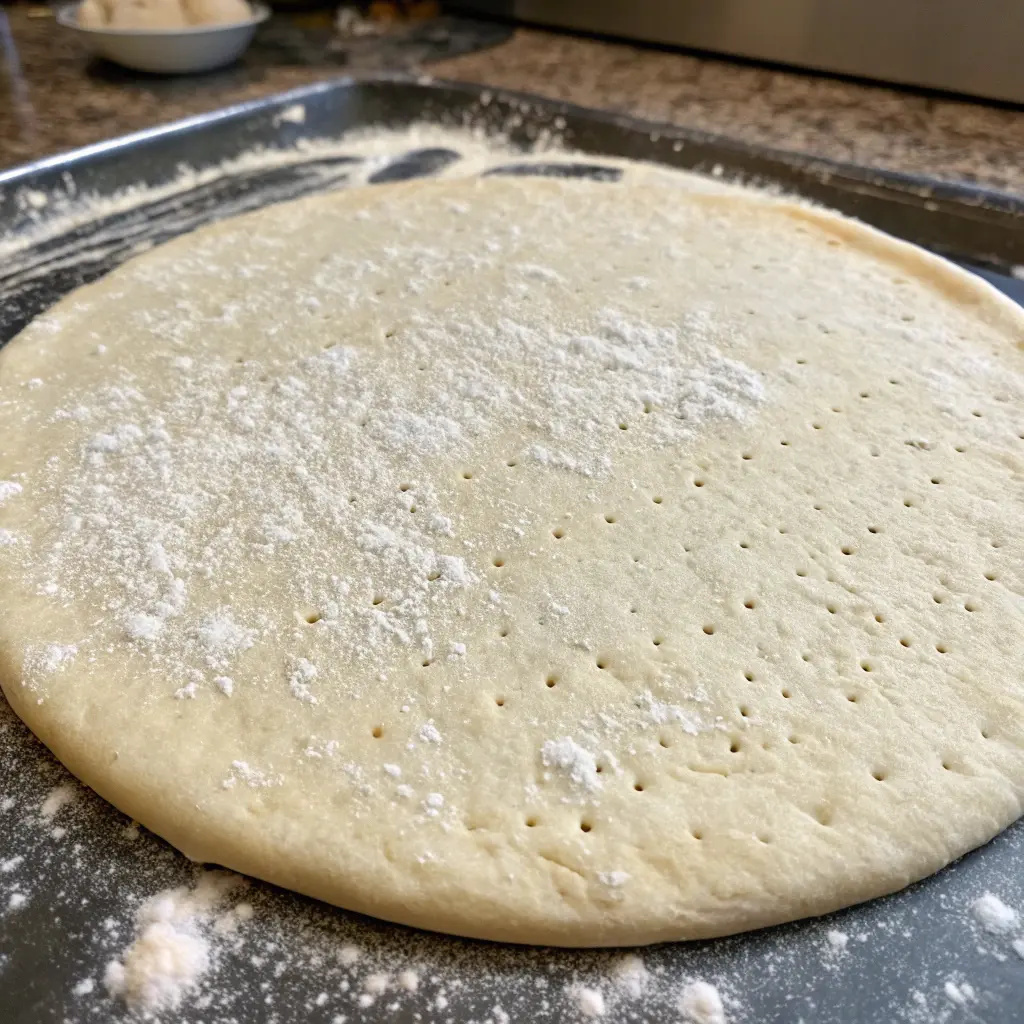
4. Shape it like a loaf boss
Once doubled, gently punch down the dough (not aggressively — we’re not mad at her).
Roll it into a rectangle, then tightly roll it up into a log and tuck the ends under.
Place it seam-side down into a greased loaf pan.
5. Second rise = glow-up
Cover the pan and let it rise again until the dough puffs up just above the rim of the pan.
This usually takes 2–4 hours.
If you rush this step, the bread will be dense. Let her live her best life.
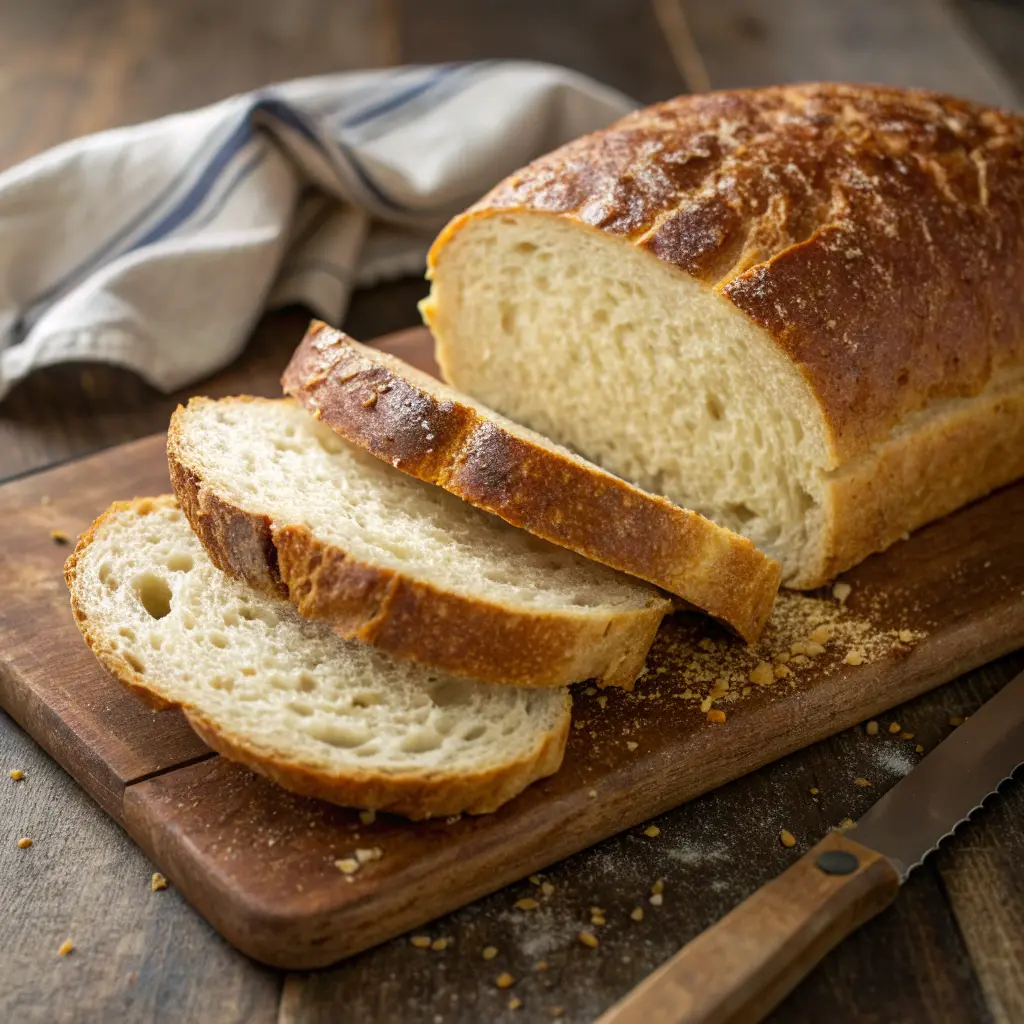
6. Bake it till golden and irresistible
Preheat your oven to 375°F (190°C).
Bake the loaf for 35–40 minutes, until:
- The top is golden
- It sounds hollow when tapped
- Your kitchen smells like happiness
Brush the top with butter right when it comes out. Trust me.
7. Cool it… yes, really
I know. I KNOW.
But let the bread cool for at least 30 minutes before slicing. Cutting too early = gummy crumb sadness.
Use this time to clean up, make coffee, and admire your work like the domestic icon you are.
Maria’s Bread Tips (Learned the Hard Way)
Soft crust secret:
Brushing butter on top while it’s hot keeps the crust tender instead of chewy.
Too sour?
Use your starter closer to its peak, not super over-fermented. Younger starter = milder flavor.
Dense loaf trauma:
Usually means under-proofed. If the dough didn’t double, it wasn’t ready. Patience, babe.
Want extra softness?
Swap half the milk for warm water + add 1 extra tablespoon butter. Cloud-level softness.
Sourdough Sandwich Bread FAQ (Because I’ve Been There)
Can I make this with whole wheat flour?
Yes, but start with half whole wheat, half all-purpose. Whole wheat drinks liquid like it’s thirsty.
Can I use water instead of milk?
Totally. Milk just makes it softer and richer, but water still works.
How long does it keep?
3–4 days at room temp, wrapped well. You can also slice and freeze it like a smart queen.
Why didn’t mine rise much?
Either the starter wasn’t active enough or your kitchen was cold. Warmth = sourdough happiness.
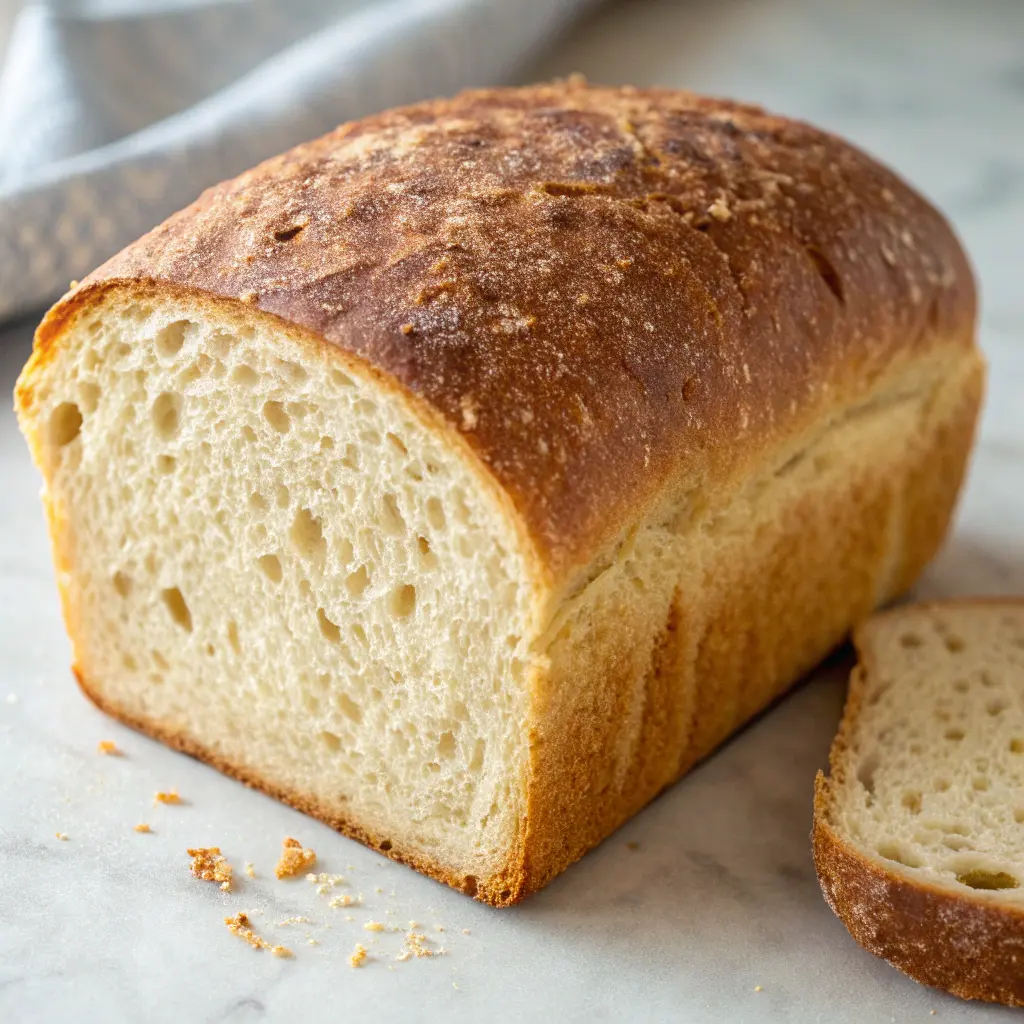
The Moment You Slice Into It
That first slice?
Soft. Light. Slightly tangy. Perfectly sturdy.
Toast it with butter.
Make a grilled cheese.
Build the sandwich of your dreams.
And just like that, you’re the friend who “makes her own bread.”
Casual. Iconic. Dangerous.
You Did That, Babe
If you’ve got a loaf cooling on your counter right now, I’m so proud of you I could cry into my apron.
This sourdough sandwich bread is one of those recipes that sneaks into your routine and never leaves — the kind you make once and then suddenly everyone expects it.
Stick around, okay?
We’ve got more cozy carbs, no-stress recipes, and kitchen confidence coming your way.
Messy buns, warm bread, and butter on everything — always.
Big hugs and fluffy slices,
Maria
Sourdough Sandwich Bread
Ingredients
- 1 cup active sourdough starter bubbly and happy
- ¾ cup warm milk whole milk = extra cozy
- 2 tablespoons honey or sugar just enough sweetness
- 2 tablespoons melted butter or oil
- 1 teaspoon salt
- 3 to 3 ½ cups all-purpose flour
Optional but encouraged:
- Extra butter for brushing the top because duh
Instructions
Mix the good vibes
- In a big bowl, stir together the starter, warm milk, honey, and melted butter.
- It should look creamy and smooth — like a cozy latte situation. If it smells slightly tangy and comforting, you’re winning already.
- Add the salt and 3 cups of flour. Mix until it comes together into a soft dough. If it feels sticky but manageable, you’re right on track. If it’s super wet, sprinkle in a little more flour — slowly, babe. Don’t panic-dump.
Knead it like you mean it
- Turn the dough onto a lightly floured surface and knead for about 8–10 minutes.
- This is your therapy moment. Push, fold, turn. Repeat.
- You’re looking for dough that’s:
- Smooth
- Elastic
- Slightly tacky but not sticky
- If you poke it and it gently springs back, congrats — you did that.
First rise (aka: let her nap)
- Place the dough in a lightly oiled bowl, cover it, and let it rise somewhere warm until doubled.
- This can take 3–5 hours depending on your kitchen and starter mood.
- No rushing here. Sourdough does not respond well to pressure — same.
Shape it like a loaf boss
- Once doubled, gently punch down the dough (not aggressively — we’re not mad at her).
- Roll it into a rectangle, then tightly roll it up into a log and tuck the ends under.
- Place it seam-side down into a greased loaf pan.
Second rise = glow-up
- Cover the pan and let it rise again until the dough puffs up just above the rim of the pan.
- This usually takes 2–4 hours.
- If you rush this step, the bread will be dense. Let her live her best life.
Bake it till golden and irresistible
- Preheat your oven to 375°F (190°C).
- Bake the loaf for 35–40 minutes, until:
- The top is golden
- It sounds hollow when tapped
- Your kitchen smells like happiness
- Brush the top with butter right when it comes out. Trust me.
Cool it… yes, really
- I know. I KNOW.
- But let the bread cool for at least 30 minutes before slicing. Cutting too early = gummy crumb sadness.
- Use this time to clean up, make coffee, and admire your work like the domestic icon you are.
Notes
- Active starter = happy loaf. If your starter isn’t bubbly and doubled, this bread will side-eye you back.
- Don’t rush the rises. Under-proofed dough = dense bread sadness. Let it puff up properly.
- Milk makes it softer. You can use water, but milk gives that cozy sandwich-bread crumb.
- Butter on top is non-negotiable. Brush it on hot for a soft, tender crust.
- Cool before slicing. I know it’s hard. I’ve failed this test many times. Still worth waiting.
- Freezer-friendly queen. Slice once fully cooled and freeze for easy weekday toast wins.