Pumpkin Whoopie Pies
Pumpkin Whoopie Pies That Taste Like Fall in Your Hands
Picture this: a chilly autumn afternoon, cozy socks on, Taylor Swift’s Folklore humming in the background, and you’re holding a soft, spiced pumpkin cookie sandwich filled with sweet, creamy frosting. Yep, that’s a Pumpkin Whoopie Pie. They’re like little handheld hugs — soft, fluffy, sweet, and packed with all the fall feels.
And the best part? They’re easier than they look. Like, “Whoa, I made these?! Yes girl, yes you did.”
Why I Love This Pumpkin Whoopie Pie Recipe
Listen, I’ve had my fair share of pumpkin treats — pies, muffins, lattes (of course). But these pumpkin whoopie pies? They’re on a whole other level. Soft, cake-like cookies with the perfect pumpkin spice balance, sandwiched around a creamy, dreamy filling. It’s basically pumpkin pie and cake had a baby, and the result is pure fall magic.
Plus, they’re portable. Which means no forks, no plates, just grab and go. I once brought a batch to a fall picnic, and let’s just say… they vanished faster than the apple cider.
Ingredients You’ll Need
Pumpkin Whoopie Pie Ingredients
- 2 cups all-purpose flour
- 1 tbsp pumpkin pie spice (or cinnamon, nutmeg, ginger mix)
- 1 tsp baking powder
- ½ tsp baking soda
- ½ tsp salt
- 1 cup pumpkin puree (not pumpkin pie filling)
- 1 cup brown sugar
- ½ cup vegetable oil (or melted butter)
- 2 large eggs
- 1 tsp vanilla extract
Filling Ingredients
- ½ cup unsalted butter, softened
- 1 ½ cups powdered sugar
- 1 tsp vanilla extract
- 2 tbsp milk or cream (as needed for consistency)
Optional Decorations
- A dusting of cinnamon sugar
- A drizzle of melted white chocolate
- Cute little fall sprinkles
Step-by-Step Instructions
1. Make the Pumpkin Batter
Preheat your oven to 350°F (175°C). Line baking sheets with parchment paper. In one bowl, whisk together flour, pumpkin pie spice, baking powder, baking soda, and salt. In another, mix pumpkin puree, brown sugar, oil, eggs, and vanilla until smooth. Gently fold dry ingredients into the wet until just combined. Don’t overmix — we want pillowy cookies, not dense rocks.
2. Bake the Cookies
Scoop the batter onto your baking sheets (think tablespoon-sized mounds). Bake 10–12 minutes until the tops spring back when lightly touched. Your kitchen will smell like a candle shop, but better. Let them cool completely before filling.
3. Whip the Frosting
Beat butter until creamy, then add powdered sugar, vanilla, and just enough milk to make it smooth and spreadable. Pro tip: taste-test with a spoon. For quality control, of course.
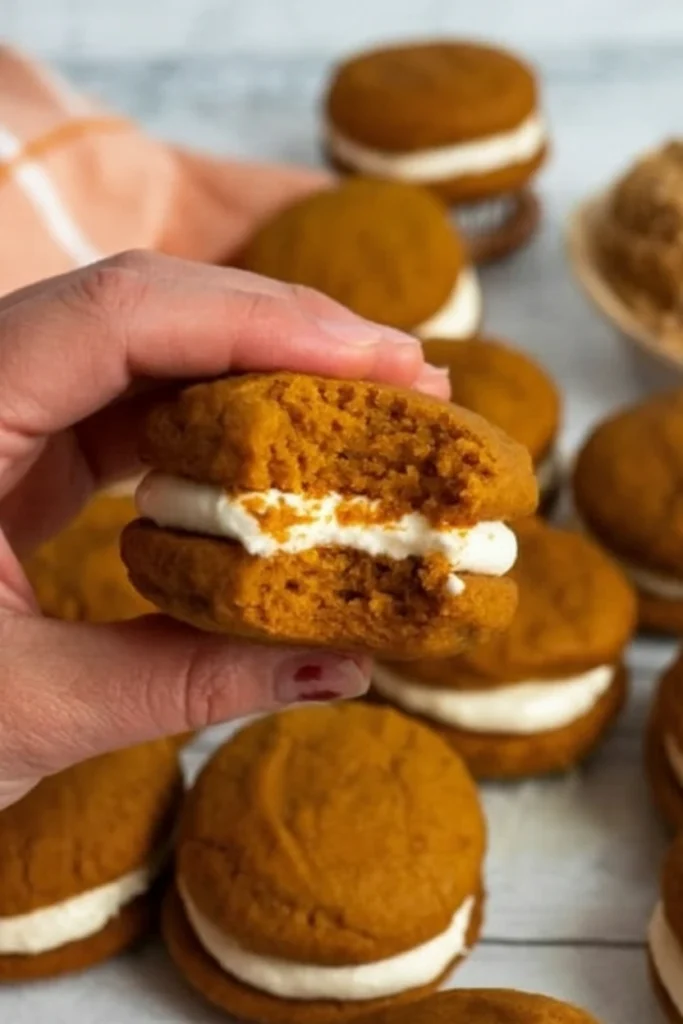
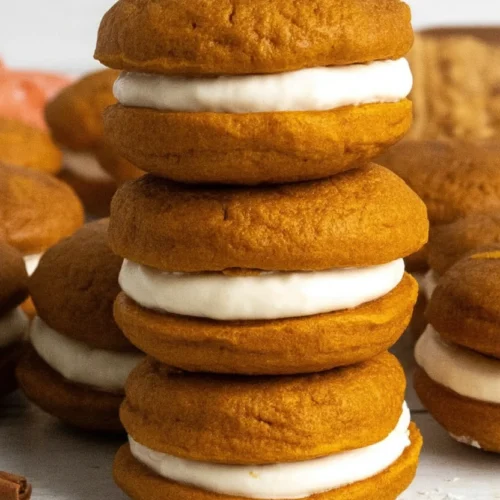
4. Assemble the Whoopie Pies
Pair cookies by size (because no one likes a lopsided sandwich). Spread frosting on the flat side of one, then top with another cookie. Lightly press. Admire your masterpiece.
Tips for the Perfect Pumpkin Whoopie Pies
- Chill the dough for 15 minutes before baking if you want neater, rounder cookies.
- Don’t overbake. Soft = dreamy. Dry = sad.
- Use a piping bag for the frosting if you want bakery-level cuteness.
- Store in the fridge — they stay moist, soft, and somehow even tastier the next day.

Variations You’ll Love
- Maple Cream Filling: Swap the vanilla for maple extract. Totally fall-core.
- Cinnamon Sugar Roll: Before baking, sprinkle dough mounds with cinnamon sugar. Instant crunch.
- Chocolate Drizzle: Melt chocolate and zig-zag it over the tops for drama.
- Vegan Twist: Use flax eggs + plant-based butter. Still fabulous.
Serving Suggestions
Pair these beauties with:
- A hot chai latte (trust me, it’s like fall exploded in your mouth).
- Apple cider for a classic combo.
- A cozy evening movie marathon (yes, Hocus Pocus counts as dinner entertainment).
These little pumpkin pillows are perfect for Thanksgiving dessert tables, fall bake sales, or just a Tuesday when you need comfort food disguised as a “snack.”
The first time I made these, I actually did a little happy dance in my kitchen. They came out golden, soft, and smelled so good I almost forgot to frost them. Almost. One bite later, and I was like, “Yep, this is my new fall tradition.”
So if you’re ready to bring a little cozy magic into your kitchen, whip up a batch of these Pumpkin Whoopie Pies. They’re easy, festive, and ridiculously good.
Love you long time,
Maria
Pumpkin Whoopie Pies
Ingredients
Pumpkin Whoopie Pie Ingredients
- 2 cups all-purpose flour
- 1 tbsp pumpkin pie spice or cinnamon, nutmeg, ginger mix
- 1 tsp baking powder
- ½ tsp baking soda
- ½ tsp salt
- 1 cup pumpkin puree not pumpkin pie filling
- 1 cup brown sugar
- ½ cup vegetable oil or melted butter
- 2 large eggs
- 1 tsp vanilla extract
Filling Ingredients
- ½ cup unsalted butter softened
- 1 ½ cups powdered sugar
- 1 tsp vanilla extract
- 2 tbsp milk or cream as needed for consistency
Optional Decorations
- A dusting of cinnamon sugar
- A drizzle of melted white chocolate
- Cute little fall sprinkles
Instructions
Make the Pumpkin Batter
- Preheat your oven to 350°F (175°C). Line baking sheets with parchment paper. In one bowl, whisk together flour, pumpkin pie spice, baking powder, baking soda, and salt. In another, mix pumpkin puree, brown sugar, oil, eggs, and vanilla until smooth. Gently fold dry ingredients into the wet until just combined. Don’t overmix — we want pillowy cookies, not dense rocks.
Bake the Cookies
- Scoop the batter onto your baking sheets (think tablespoon-sized mounds). Bake 10–12 minutes until the tops spring back when lightly touched. Your kitchen will smell like a candle shop, but better. Let them cool completely before filling.
Whip the Frosting
- Beat butter until creamy, then add powdered sugar, vanilla, and just enough milk to make it smooth and spreadable. Pro tip: taste-test with a spoon. For quality control, of course.
Assemble the Whoopie Pies
- Pair cookies by size (because no one likes a lopsided sandwich). Spread frosting on the flat side of one, then top with another cookie. Lightly press. Admire your masterpiece.
Notes
- Chill the dough 10–15 minutes for rounder cookies.
- Don’t overbake — soft cookies are key.
- You can swap vanilla frosting for cream cheese frosting for a tangy twist.
- Store in an airtight container in the fridge up to 5 days; they actually taste better the next day.
- Gluten-free version: use 1:1 gluten-free flour.
- Vegan version: replace eggs with flax eggs and butter with plant-based alternatives.