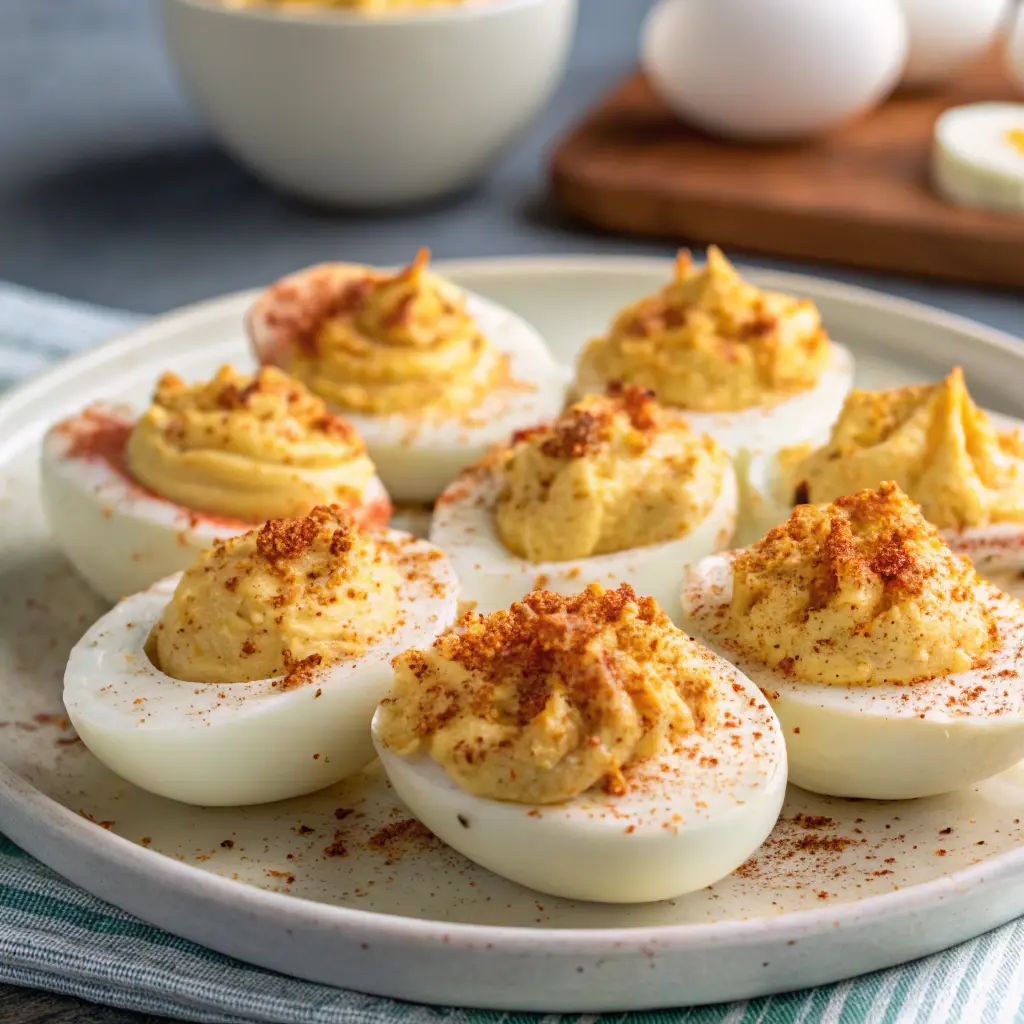
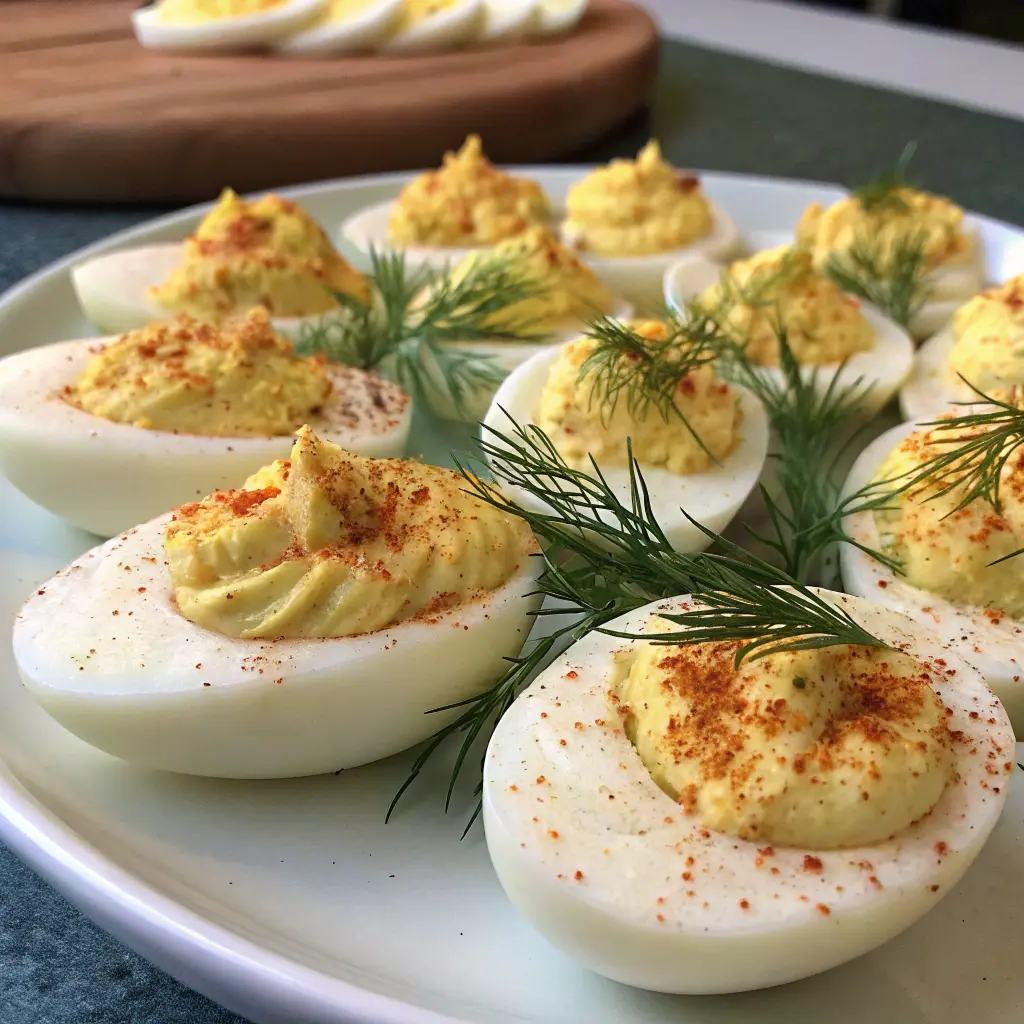
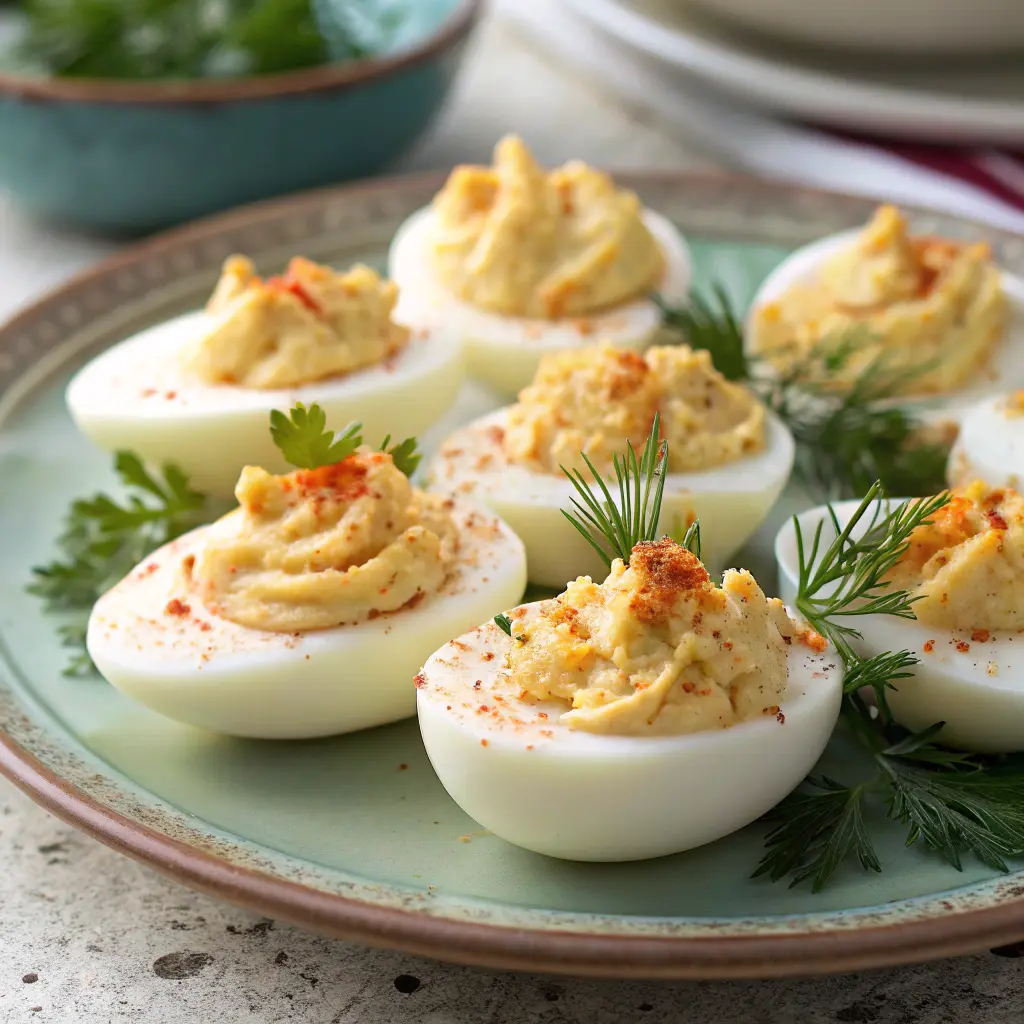
Deviled Eggs
My Perfectly Tangy & Creamy Deviled Eggs
Girl, you know those moments when you want a snack that’s bite-sized, creamy, tangy, and basically screams “I love myself enough to snack well”? Yeah, that’s deviled eggs for you.
First time I made these, I swear my friends nearly started a bidding war over who got the last one. They’re classic, simple, and yet… somehow fancy enough to make you feel like a kitchen goddess. Bonus: they’re basically portable happiness. Perfect for brunch, parties, or just “treat yourself Wednesday.”
Why I’m Obsessed with These Deviled Eggs
Babe, here’s the tea — deviled eggs are the OG party snack, but done right, they’re a full-on flavor bomb. You get that silky yolk filling, a little tang from mustard, a smidge of mayo (don’t skimp!), and the tiniest pinch of spice to keep things interesting.
First time I made them? I thought I was just making a snack. Two hours later, the plate was gone, and I was like… “Wait, I didn’t even get one?” Lesson learned: make double, always double.
These are creamy, tangy, a little zesty, and soooo customizable. You can keep them classic or go full-on diva with bacon, chives, paprika, or even sriracha. Basically, they’re snack perfection.
What You’ll Need for These Deviled Eggs
Alright, let’s get to the goods. Here’s the shopping list so your snack dreams come true:
- 6 large eggs (pro tip: older eggs peel easier — who knew?)
- 3 tablespoons mayonnaise (rich, creamy, and comforting)
- 1 teaspoon Dijon mustard (or spicy brown if you like a lil’ kick)
- 1 teaspoon apple cider vinegar (trust me, it wakes up the yolks)
- Salt & black pepper, to taste (season like you mean it)
- Paprika, for that glam finish
- Optional extras: chopped chives, crispy bacon bits, a tiny squirt of sriracha, or pickled jalapeños if you’re feeling wild
Pro Tip: Once, I added a teeny bit of pickle juice instead of vinegar… and babe, it was game-changing. Tangy, bright, and oh-so-addictive. Highly recommend for a twist!
How to Make These Deviled Eggs
a.k.a. the easy-peasy, creamy snack magic
1. Hard boil like a pro
Fill a saucepan with water and gently place your eggs in. Bring to a boil, then lower the heat and simmer for 10 minutes. Quick tip: after boiling, immediately dunk them in an ice bath. This stops the cooking and makes peeling 10x easier. Trust me, no one wants a shredded egg disaster.
2. Peel and slice
Once your eggs are cool, peel ‘em like a boss. Slice them in half lengthwise. I always do this over a bowl because sometimes the yolks have a little crumbly moment… you don’t want them all over the counter.
3. Scoop out the yolks
Time for the fun part! Gently scoop the yolks into a small bowl. Set those whites aside — they’re basically little edible boats, ready to be filled with creamy goodness.
4. Make that luscious filling
Mash the yolks with a fork until smooth. Add mayonnaise, mustard, vinegar, a pinch of salt, and pepper. Mix until silky, dreamy, and totally spreadable. At this point, taste it! Adjust flavors if you want more tang, more mustard kick, or more mayo-y creaminess.
5. Fill those eggs like a queen
Spoon the yolk mixture back into the egg whites — or, if you’re feeling fancy, pipe it with a zip-top bag and cut a tiny corner. I swear, presentation makes people think you spent hours when really, it’s under 15 minutes.
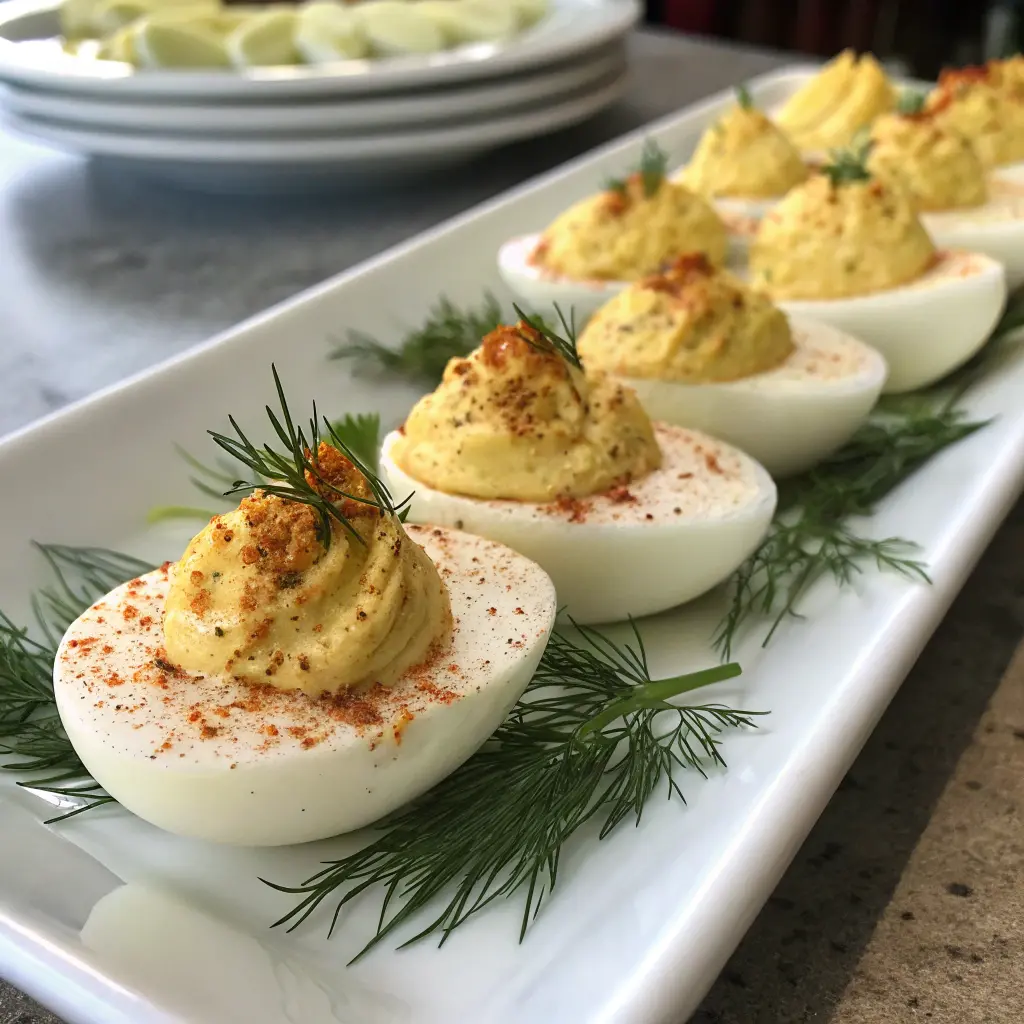
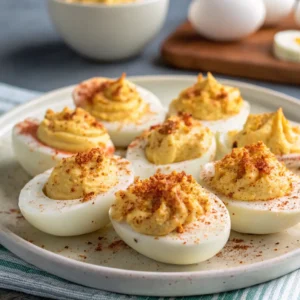
6. Sprinkle, garnish, slay
Finish with a little paprika for color. If you’re extra (and why wouldn’t you be?), add chives, bacon, or even a tiny swirl of sriracha. Instant snack-glam.
Maria’s Deviled Egg Tips (aka: What I Learned the Hard Way)
Egg peeling is sacred
I once used super fresh eggs and ended up with eggs that looked like they survived a war. Older eggs = easier peeling. Learn from me.
Mash smooth or cry later
Chunky yolks are cute if you want rustic vibes, but smooth yolk filling = silky bites of heaven. Mash, mix, taste, repeat.
Season like you’re not joking
I used to skimp on salt and vinegar — rookie mistake. A little tang, a little salt, and bam — flavor explosion.
Don’t forget the garnish
Paprika isn’t just decoration. It adds a subtle smokiness that elevates the flavor. Plus, it looks fancy AF.
Double the batch
You’ll regret it if you don’t. People will definitely eat more than one.
Variations & Fun Twists
- Bacon Lover’s Edition: Toss in crispy bacon bits to the yolk mixture. Instant crowd-pleaser.
- Spicy Queen: Add sriracha or a dash of cayenne for heat. Be bold, babe.
- Herb Garden Vibes: Chives, dill, or parsley make these pop with freshness.
- Pickle Party: Finely chopped pickles or a splash of pickle juice for tangy goodness.
- Everything Bagel Magic: Sprinkle a little everything bagel seasoning on top. Unexpected and fab.
Deviled Egg FAQ (aka: Maria’s Kitchen Hacks)
Can I make these ahead?
Totally! Make the yolk filling, but wait to fill the whites until just before serving. Keeps them fresh and cute.
Can I use Greek yogurt instead of mayo?
Yes, but girl… it’s tangier and a little less creamy. Still delish if you want to be healthy-ish.
Why are my yolks crumbly?
Probably overcooked. Stick to that 10-minute simmer + ice bath routine. It’s golden.
Can I freeze deviled eggs?
Babe, nope. They’ll turn sad and watery. Make fresh, eat fresh. Life’s too short.
You Did That, Queen!
Deviled Eggs
Ingredients
- 6 large eggs pro tip: older eggs peel easier — who knew?
- 3 tablespoons mayonnaise rich, creamy, and comforting
- 1 teaspoon Dijon mustard or spicy brown if you like a lil’ kick
- 1 teaspoon apple cider vinegar trust me, it wakes up the yolks
- Salt & black pepper to taste (season like you mean it)
- Paprika for that glam finish
- Optional extras: chopped chives crispy bacon bits, a tiny squirt of sriracha, or pickled jalapeños if you’re feeling wild
Instructions
Hard boil like a pro
- Fill a saucepan with water and gently place your eggs in. Bring to a boil, then lower the heat and simmer for 10 minutes. Quick tip: after boiling, immediately dunk them in an ice bath. This stops the cooking and makes peeling 10x easier. Trust me, no one wants a shredded egg disaster.
Peel and slice
- Once your eggs are cool, peel ‘em like a boss. Slice them in half lengthwise. I always do this over a bowl because sometimes the yolks have a little crumbly moment… you don’t want them all over the counter.
Scoop out the yolks
- Time for the fun part! Gently scoop the yolks into a small bowl. Set those whites aside — they’re basically little edible boats, ready to be filled with creamy goodness.
Make that luscious filling
- Mash the yolks with a fork until smooth. Add mayonnaise, mustard, vinegar, a pinch of salt, and pepper. Mix until silky, dreamy, and totally spreadable. At this point, taste it! Adjust flavors if you want more tang, more mustard kick, or more mayo-y creaminess.
Fill those eggs like a queen
- Spoon the yolk mixture back into the egg whites — or, if you’re feeling fancy, pipe it with a zip-top bag and cut a tiny corner. I swear, presentation makes people think you spent hours when really, it’s under 15 minutes.
Sprinkle, garnish, slay
- Finish with a little paprika for color. If you’re extra (and why wouldn’t you be?), add chives, bacon, or even a tiny swirl of sriracha. Instant snack-glam.
Notes
- Older eggs peel way easier than super fresh ones — if you can plan ahead, do it.
- An ice bath right after boiling helps prevent that green ring around the yolk and makes peeling less dramatic.
- Taste the yolk filling before filling the eggs and adjust salt, vinegar, or mustard to your liking.
- For a smoother filling, mash the yolks really well or use a small food processor.
- If making ahead, store the filling and egg whites separately and assemble right before serving for best texture.
- Always make extra — deviled eggs have a magical way of disappearing fast.