5 Comfort Food Recipes with a Healthy Twist You’ll Love!
Okay, real talk — I wasn’t sure healthy comfort food could actually feel comforting. But after some kitchen fails (and a few surprises), I found recipes that hit just right. Like that garlic butter chicken? I laughed so hard when it turned out better than I expected. These dishes are little food hugs, perfect for cozy nights or sneaky snacks. Let’s dive in!
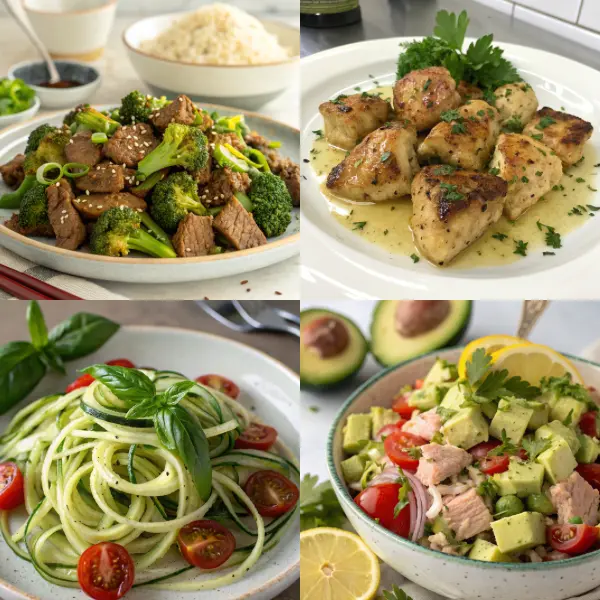
Zucchini Noodles – My Totally Unexpected Crush
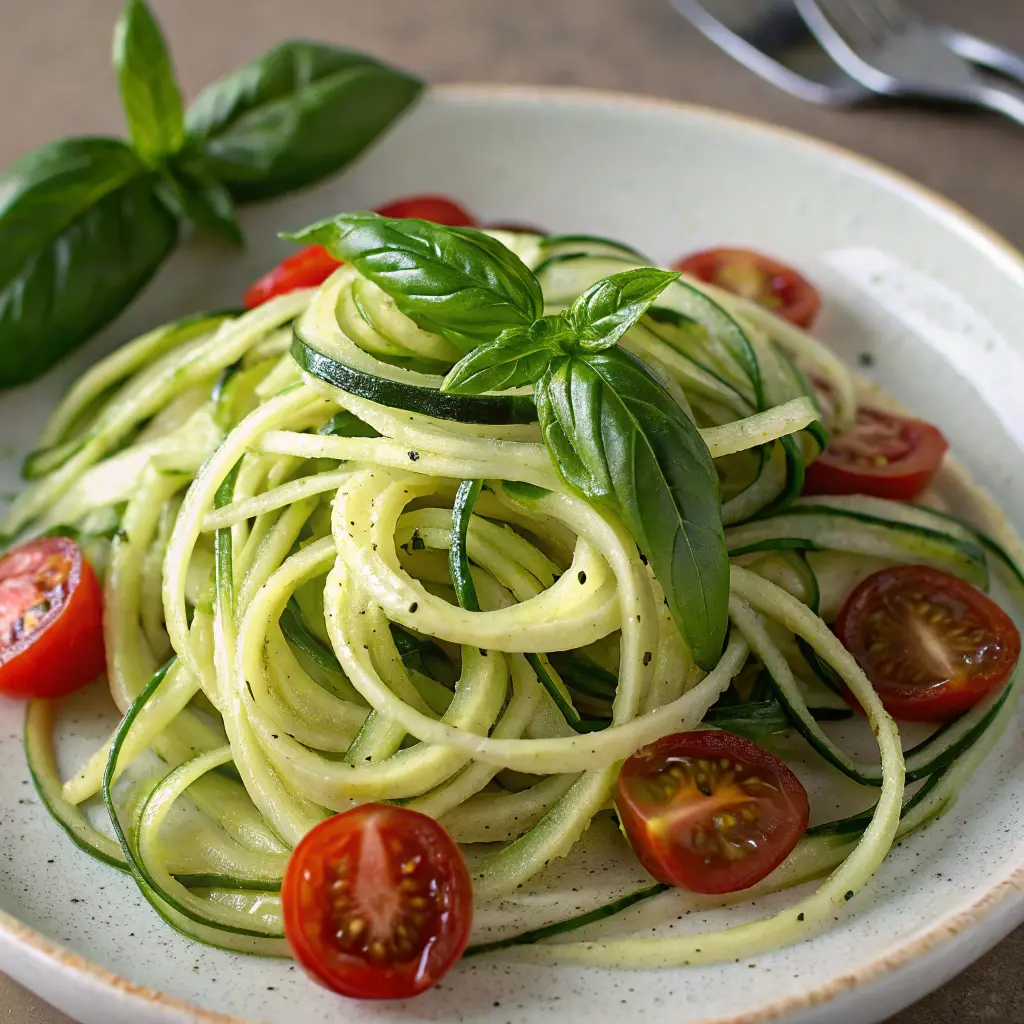
Alright, real talk — I was suuuper skeptical about zucchini noodles at first. Like, how’s a veggie gonna replace my fave pasta? But girl, the moment I twirled those green little spirals around my fork, I was shook! They’re crunchy but still just soft enough to soak up all that saucy goodness. One time, I tossed mine with fresh pesto and Parmesan, and honestly? I laughed out loud because it was way better than I ever thought it’d be. Didn’t expect to fall this hard! Now, zucchini noodles are my go-to when I want something light but still totally satisfying.
Ingredients:
- 3 medium zucchinis (spiralized into noodles)
- 1 tbsp olive oil
- 2 cloves garlic, minced
- Salt and pepper to taste
- ½ cup grated Parmesan cheese (optional)
- Fresh basil or parsley for garnish (because why not?)
How to Make Zucchini Noodles:
1. Spiralize the magic
Grab your zucchinis and spiralize them into noodles. If you don’t have a spiralizer, no worries—thin slices work too! Just try to keep them noodle-ish.
2. Sauté time!
Heat olive oil in a big pan over medium heat. Toss in your garlic and let it get all fragrant (about 30 seconds). Then, add your zucchini noodles. Here’s the trick: sauté them super quick, like 2-3 minutes max! We want crunch, not mush.
3. Season like a boss
Sprinkle salt and pepper, and toss everything to mix. Watch out, the zucchini will start releasing some water, so drain if needed—nobody likes a soggy mess!
4. Finish strong
Slide those noodles onto your plate, sprinkle with Parmesan, and top with fresh herbs. Boom! Dinner’s served.
Maria’s tip: Please, please don’t overcook these bad boys! Drain ‘em good and give ‘em a quick sauté with a splash of olive oil—that crunch is everything. Soggy zucchini? No thanks, girl, not on my watch!
Avocado Tuna Salad – My Fresh, Zesty Lifesaver
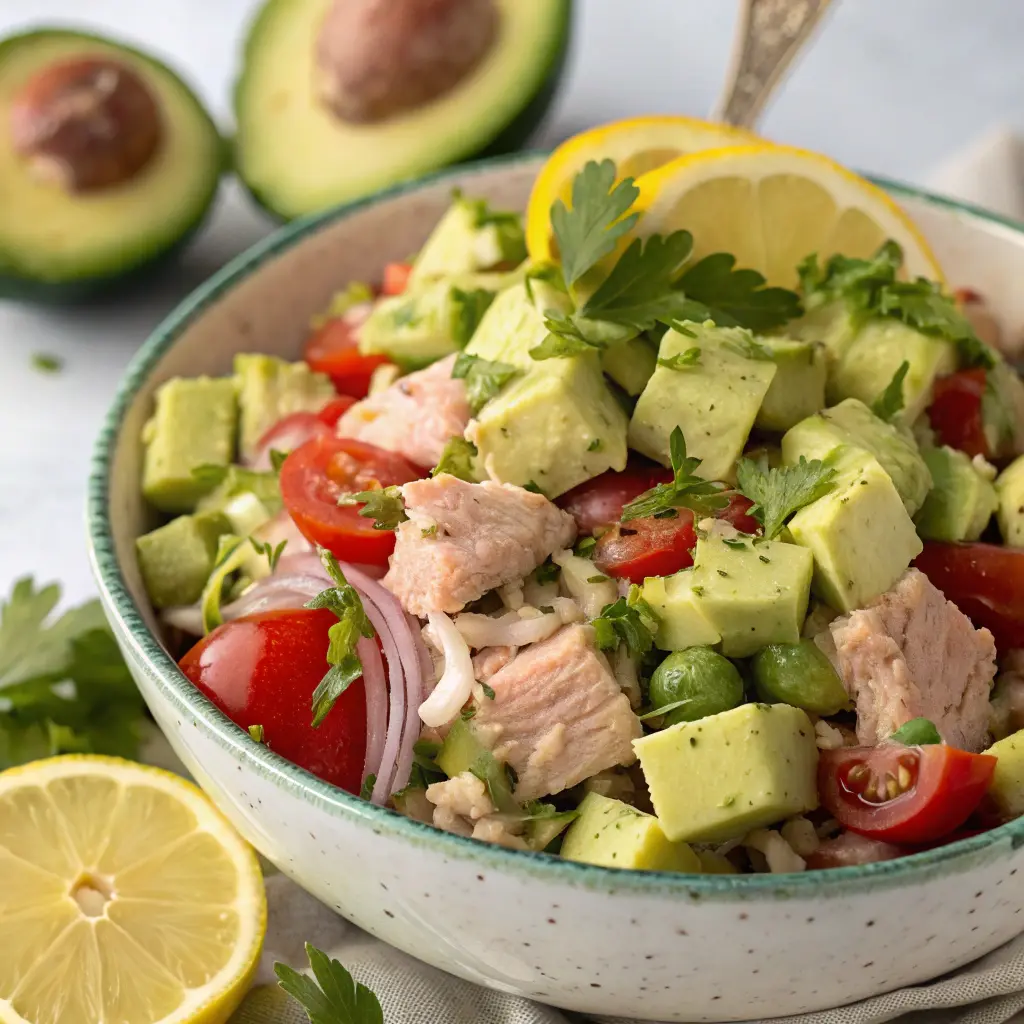
Girl, lemme tell ya, I used to be so unsure about tuna salad — it always felt like sad office lunch vibes. But then, one day I mashed in some creamy avocado and, oh my gosh, it was like my tastebuds did a happy dance! I wasn’t expecting that buttery texture and those little crunchy veggie bits to be so satisfying. One time, I added a squeeze of lime and some chopped cilantro, and let me just say, I nearly texted everyone I know to share how good it was. It’s fresh, bright, and honestly… it’s saved me more than once when I was too tired to cook anything else.
Ingredients:
- 1 ripe avocado, mashed up like it’s gonna be the star
- 1 (5 oz) can tuna, drained and ready to mingle
- ¼ cup red onion, diced for that crunchy vibe
- ¼ cup celery, chopped up for extra crunch
- Juice of ½ lime, fresh and zippy
- 2 tbsp chopped cilantro, because you know it’s magic
- Salt & pepper to taste
How to Make Avocado Tuna Salad
1. Avocado Magic
Mash that avocado in a bowl—smooth but still with little creamy bits. We’re talkin’ silky guac vibes, but with more attitude.
2. Tuna Crush
Fold in the tuna, onion, and celery. Toss it around gently—it’s all about that perfect mix of creamy and crunchy.
3. Limey Freshness
Squeeze in the lime juice and sprinkle in the cilantro. Give it a lil’ taste test and season with salt & pepper. Don’t be shy!
4. Scoop & Smile
Scoop it onto toast, crackers, or even lettuce cups if you’re feelin’ fancy. Take a bite and savor that creamy, tangy perfection—this is what lunchtime dreams are made of!
Maria’s tip: Don’t be afraid to play around — sometimes I even add chopped pickles or a sprinkle of smoked paprika to give it a little smoky mystery. Just trust your gut and make it yours!
Grilled Fish Tacos – My Beachy Escape in a Tortilla
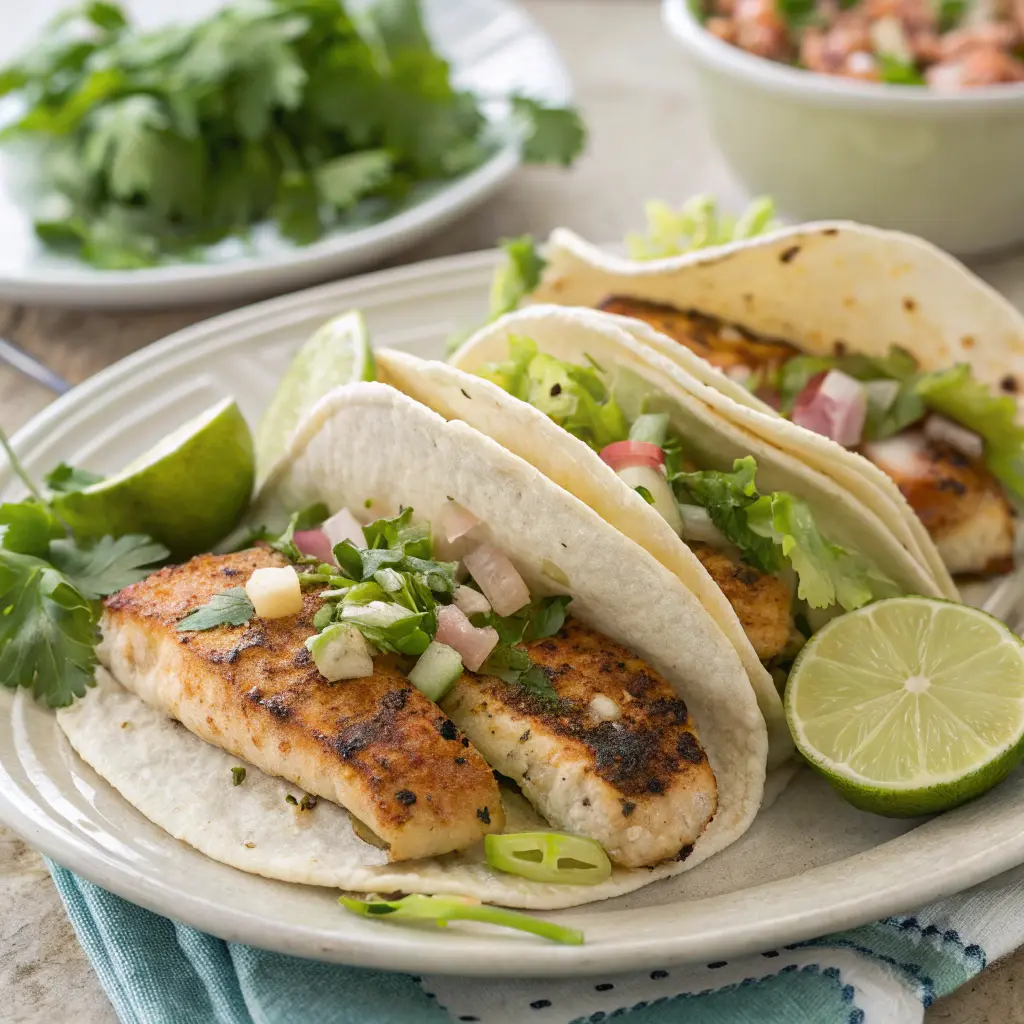
Okay, real talk — I never thought I’d be the girl obsessed with fish tacos. Like, fish? In a taco? But babe, the first time I grilled some fresh white fish and tucked it into a warm tortilla… it was a total game changer. That flaky, charred fish with all the crunchy cabbage and creamy avocado? Oh my gosh. One time, I threw in a squeeze of lime and some spicy salsa, and I literally had to pause for a sec ‘cause it felt like a mini beach vacation in my mouth. Now, these tacos are my secret weapon when I wanna feel fancy without actually trying too hard.
Ingredients:
- 1 lb white fish fillets (like cod or tilapia), cut into chunks
- 1 tbsp olive oil
- 1 tsp chili powder
- ½ tsp smoked paprika
- ½ tsp garlic powder
- Salt & pepper to taste
- Juice of 1 lime
- Corn or flour tortillas (your choice!)
Toppings: shredded cabbage, sliced avocado, fresh cilantro, salsa, lime wedges
How to Make Grilled Fish Tacos:
1. Fishy Fiesta
Toss the fish chunks in olive oil, chili powder, smoked paprika, garlic powder, salt, and pepper. Squeeze in that lime juice like it’s your last sunny day. Let it hang out for 10 minutes to soak up the flavors.
2. Grill & Chill
Fire up your grill or a grill pan. Cook the fish for about 3-4 minutes per side—until it’s cooked through and has those gorgeous charred edges. (I had to fight myself not to eat it straight from the pan, no shame.)
3. Taco Time
Warm up your tortillas (I just toss mine on the grill for a hot second). Then, layer on that juicy fish, followed by all the crunchy, creamy toppings you want. Don’t hold back—this is your masterpiece!
4. Enjoy Every Bite
Squeeze a little extra lime on top, and go for that first bite. I swear, I was dancing around the kitchen the first time I nailed these!
Maria’s tip: If you’re feeling fancy, whip up a quick crema with sour cream, lime juice, and a little hot sauce. Drizzle it over the tacos, and you’ll be queen of the taco party!
Beef & Broccoli Stir Fry – My Go-To Comfort Combo
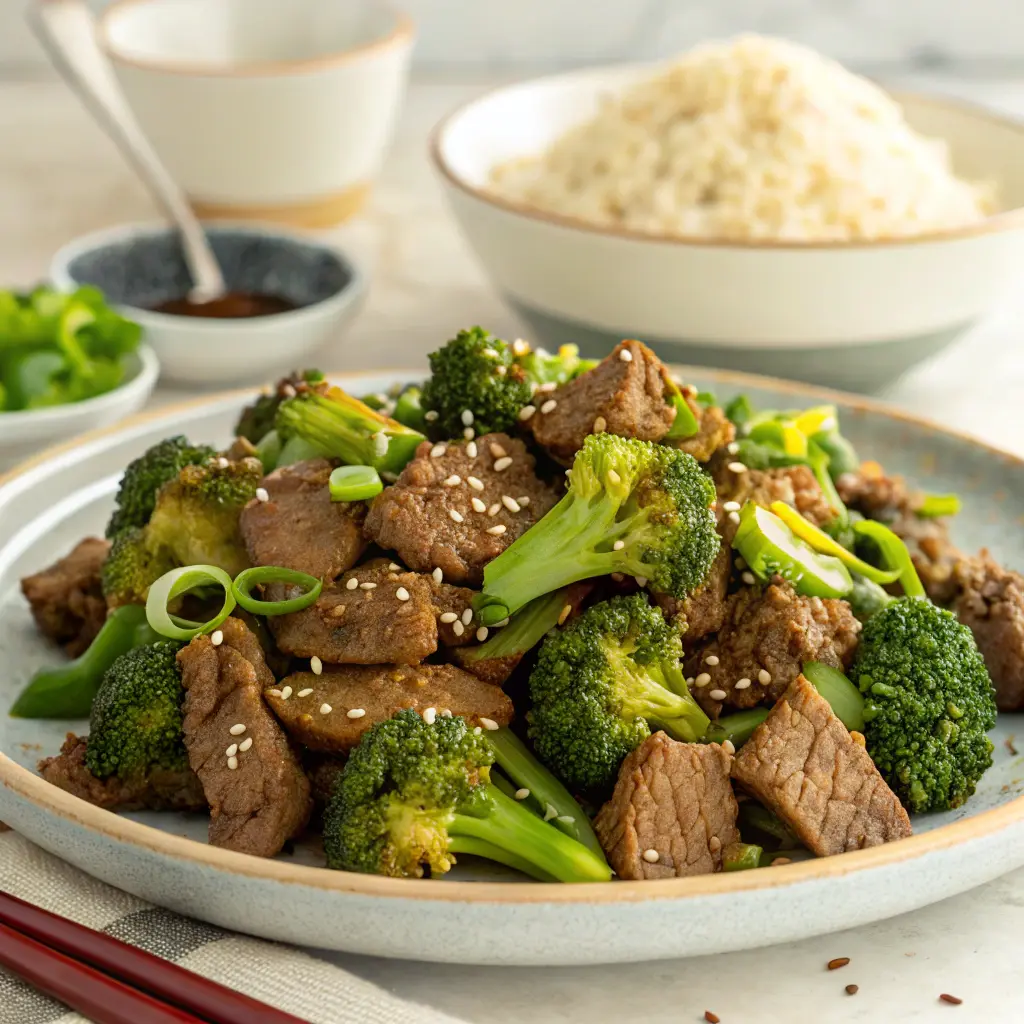
Oh girl, don’t even get me started on beef and broccoli. I’ll be honest — the first time I tried making it at home, I was kinda intimidated. Like, how do you get that perfect, glossy sauce? But once I nailed it, I swear I did a happy dance in my kitchen! The beef turns all tender and juicy, and the broccoli gets that perfect crisp-tender vibe. One night, I was so hungry and just threw it together — and it totally hit the spot. Now, whenever I’m craving something cozy and satisfying, this is my ride-or-die stir fry.
Ingredients:
- 1 lb flank steak or sirloin, thinly sliced against the grain
- 2 cups broccoli florets
- 2 tbsp soy sauce (low sodium if you want!)
- 1 tbsp oyster sauce (optional, but oh so good)
- 1 tbsp honey
- 2 cloves garlic, minced
- 1 tsp grated fresh ginger
- 1 tbsp sesame oil (or veggie oil)
- Salt & pepper to taste
- Sesame seeds & sliced green onions for that final flourish
How to Make Beef & Broccoli Stir Fry:
1. Marinate & Mingle
Toss your sliced beef in a bowl with soy sauce, oyster sauce, honey, and a little black pepper. Let it hang out for 10 minutes — this quick marinade does wonders!
2. Broccoli Boost
Blanch the broccoli in boiling water for just a couple of minutes, then shock it in ice water to keep that bright green pop. (Totally worth it, trust me.)
3. Sizzle Time
Heat your sesame oil in a big ol’ skillet or wok. Throw in the beef slices and let them get that glorious sear — about 2-3 minutes tops. Remove the beef and set aside.
4. Broccoli Reunion
In that same pan, add garlic and ginger — let them get all fragrant and cozy. Toss in your blanched broccoli, stir for a minute, then invite the beef back to the party.
5. Saucy Finish
Add a splash more soy sauce if you’re feelin’ it. Stir everything together for another minute until it’s all glossy and irresistible.
6. Plate & Celebrate
Sprinkle on some sesame seeds and green onions. Take a moment to admire your creation — then go ahead and dig in! I literally did a lil’ happy dance in my kitchen the first time I made this — so good.
Maria’s tip: Slice that beef thin and against the grain — it’s the little secret that makes it melt-in-your-mouth good!
Garlic Butter Chicken Bites – My Little Flavor Bombs

Oh girl, lemme tell ya, I was so skeptical about this recipe at first — I mean, it’s just chicken bites, right? But the first time I tried it, I was literally squealing in the kitchen. The chicken gets all golden and juicy, and that buttery garlic sauce? Ugh, it’s basically magic in a skillet.
I remember one time I didn’t even measure the garlic, I just went in — and oh my gosh, it was so garlicky and delicious, I couldn’t stop eating. Now, it’s my go-to when I want a fast dinner that still feels kinda fancy.
Ingredients:
- 1 lb boneless, skinless chicken breast or thighs, cut into bite-size chunks
- Salt & pepper, to taste
- ½ tsp smoked paprika
- ½ tsp garlic powder
- 2 tbsp olive oil
- 3 tbsp butter
- 4 cloves garlic, minced
- 1 tbsp chopped fresh parsley (for that pretty pop!)
How to Make Garlic Butter Chicken Bites:
1. Chicken Prep
Season those cute lil’ chicken pieces with salt, pepper, smoked paprika, and garlic powder. Massage it in real good — trust me, it’s worth the extra minute.
2. Sizzle Time
Heat olive oil in a large skillet over medium-high heat. Add the chicken and cook until golden and cooked through — about 5-6 minutes. Take it out and set aside (I usually steal a piece to taste-test, don’t judge).
3. Garlic Butter Magic
In the same skillet, melt the butter and add the minced garlic. Let it get all fragrant and bubbly, about a minute (careful not to burn it!).
4. Toss & Finish
Bring the chicken back to the skillet and toss it in that glorious garlic butter sauce. Sprinkle with fresh parsley, and just soak in those mouthwatering smells.
5. Serve & Savor
Honestly, I could eat these straight outta the skillet with a fork. Or pile ‘em on rice, a salad, or just… devour ‘em on their own. Every bite is juicy, buttery perfection.
Maria’s tip: Don’t skip the final butter swirl — it’s what makes the whole thing taste like it came from your favorite restaurant, I swear!
Life’s too short for boring food, babe! Try these healthy comfort recipes and add your own twist — they’re fun, cozy, and always hit the spot. Let’s keep that flavor adventure going together!